Deploying Static WireGuard
Overview
Your network is now configured with Hosts, acting as Endpoints, Relays, Egress, and Remote Access Gateways. Before we move on to adding Users to your network, let’s take care of any of the devices which are not user-managed, and do not support the Netclient, using Client (WireGuard) Configuration Files.
These static WireGuard configuration files will allow you to add devices to your network such as Routers and other non-standard devices. They can also be used to run a privileged, always-on VPN on user devices, which is managed by administrators.
There are three primary reasons you may want to use Static Clients with your network:
Admin-Managed, Always On VPN for User Devices
The Remote Access Client is typically used to give users access to the VPN. However, this client is “on-demand” and requires user authentication to run. You may find yourself in a situation where you want the VPN to run every time the device is booted. Perhaps you are configuring fresh user workstations with VPN access which should be “always-on.” This is a good use case for Static Clients.
Site-to-Site Connectivity via Routers/
There are other ways to configure site-to-site connectivity with Netmaker, but one easy way is to utilize the WireGuard plugins which are supported on a large number of Routers today. You can generate a Static Client, configur them with additional routes (for the local network behind the router), and apply the configuration to routers via the supported plugin, to give full access between the site and the VPN.
Integrate Non-Native Devices
The Netclient runs on Windows, Linux, and Mac. The Remote Access Client runs on all of these plus Android and iOS. For everything else, there’s the static WireGuard config, which can be run on anything that supports WireGuard.
Limitations of Static WireGuard Files
The Netclient dynamically updates and receives information about peers in the network. When using a static configuration file, it cannot receive any updates, and thus has some limitations.
Static Configuration
The primary limitation of the static config file is that it is static. It will have routes for everything that exists at the time it is generated, including the whole VPN network range. So new VPN endpoints will be accessible. However, if you generate an Egress or Internet gateway, config files will need to be re-generated. Also, if your Remote Access Gateway changes its public key or endpoint. Using the API and some automation tools will help alleviate this problem in some scenarios, which we will discuss later on.
This is alleviated by the Hub-And-Spoke pattern used with the config files. Because they gain access to the VPN using the hub, as long as the hub’s information remains the same, these configs will continue to work. However, this introduces another limitation.
Hub-And-Spoke Architecture
An additional limitation is that access to and from the network from these static endpoints go through a gateway. There will always be an extra hop for connections, which can reduce the network speed and produce a bottleneck for traffic. However, this comes at the advantage of higher connectivity and consistency.
Deploying Static Clients
Before we can create static clients, we need a Remote Access Gateway, which acts as the “Hub” for these connections. This gateway forwards traffic to and from the clients, acting as a middle point for connections. This should have been deployed in the previous section. If you need a refresher, go back and look. But you simply need to set a Host in a public environment as the gateway.
Configuring the Remote Access Gateway
Before creating your clients, there are some global settings you can put on your gateway which will be applied to all generated clients by default. To access these settings, click on the dropdown on the gateway on the left side of the Remote Access tab.
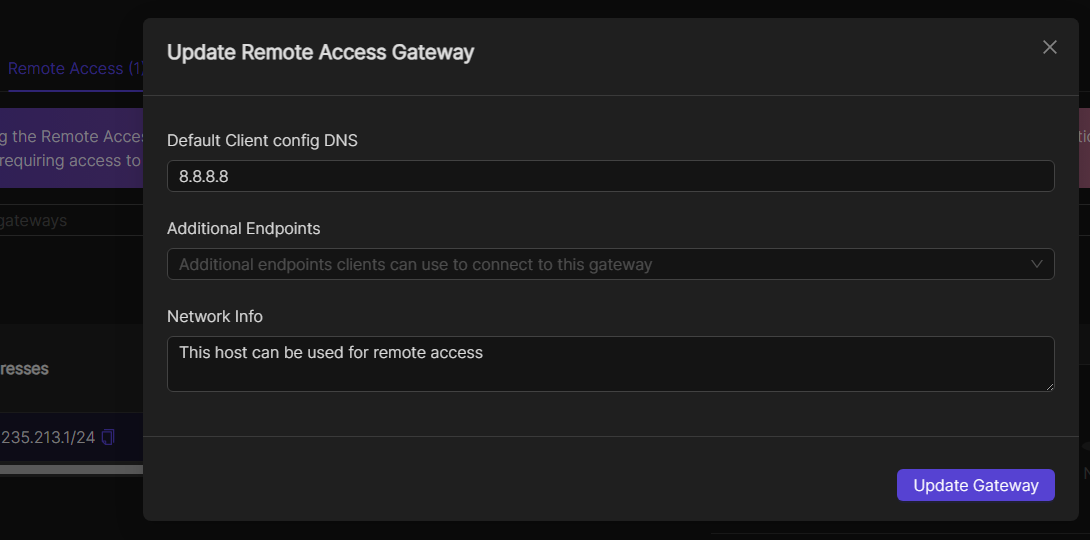
DNS
The “Remote Access Gateway” DNS configuration sets a DNS server for all the static clients generated under this specific gateway. However, this setting can be overridden while generating individual clients using the advanced configuration settings.
This should be used for either:
-
Providing a public DNS server which is accessed while using features like the Internet Gateway, to avoid DNS leaks. If using an Internet Gateway, DNS traffic will route to the gateway first, and then to the public DNS server.
-
Providing a private DNS server which gives the clients information about local sites (for instance myapp.company.local). The DNS server must be accessible, either directly over the VPN or via Egress Gateway. For instance, if you have a DNS server at 192.168.1.52, have an egress gateway with a route to this IP, and your clients will now be able to use the local DNS.
Additional Endpoints
This is an advanced feature for users who have placed their Remote Access Gateway in a location, and want it to be accessible over a different IP address.
This is used in tandem with the Remote Access Client, which allows users to specify the connection endpoint. The typical use case is having a RAG deployed in an office network, and adding the local IP as an endpoint for the gateway. This allows users to connect over the local IP when they are in the office, which will increase the speed of connections.
Network Info
When users use the Remote Access Client, they will see this information. Typically, it’s a description of what the users will be able to access over the VPN, since they will see it in the information in their local client before connecting.
Generating Clients
Static clients can be generated through the Netmaker UI, or over API (see How to Guide) . After generating these client configurations, they can be imported and used on any operating system that supports WireGuard, including Windows, MacOS, Linux, Android, BSD, iOS and many router operating systems.
-
Add a new node

-
Choose the config files option, specify the node name, and select your gateway.

Even if your node is not configured as a remote access gateway in the gateway list, it will be automatically created during this process.
-
Select Config files filter and click on your WG config file to download the WG configuration you created for the target device.

-
Run the WireGuard configuration on the target device
Another option is to create the WG config client through the Remote Access interface by following these steps:
-
Go to the Remote Access interfce of your network
-
Select a Remote Access Gateway
-
Click the the “Create Config” button on the right side above “VPN Config Files”
-
(optional) configure as desired
-
Click “Create Client”

Static clients cannot be automatically updated after the configuration file has been deployed to your specific devices. Any changes to the static client configuration file has to be manually updated on their respective devices.
Client Settings
When creating a client, the dialog box presents some optional fields you may wish to set:

Client ID - an identifier for the config
Public Key - You may generate a public/private keypair locally, and specify the public key kere. This will allow you to keep the private key off the server, which will enhance security. However, you will need to store and paste in the private key to the configuration file after download.
DNS - This overrides whatever is set as the default Gateway DNS server, and will be applied as the DNS settings for the VPN tunnel.
Additional Addresses - This field can be used to create your own “egress gateway” from a static file. Other peers in the network will be told that this static client will route traffic for these addresses. In the above picture we have added two routes for “192.168.5.0/24” and “10.10.10.0.0/16.” This is advertised to all the peers in the network, and they will attempt to send traffic to these addresses via the static client.
Note that you will have to manually configure the device to forward traffic. However, you can also set this in the PostUp and PostDown commands.
Post Up and Post Down - The “Post Up” and “Post Down” fields are commands that get run locally by WireGuard when the interface is brought up (Post Up) and down (Post Down). This can be useful for setting routing or firewall rules on the device whenever the interface is created and destroyed. In our example, we have added an iptables firewall command to allow all ssh connections originating from the netmaker interface when the WireGuard tunnel is alive.
Viewing and Downloading the Config File
After generation, the configuration file can be viewed or downloaded by clicking the client id in the UI and then then the “View/Download config” button. This will show the client’s full WireGuard configuration and it will also provide a handy QR code to scan and import the configuration file on mobile devices.

Applying to Devices
The generated static client configuration files can be used in various different platforms and operating systems. These files can be applied to any device that supports WireGuard. However, depending on the system, you may not be able to import or run the file directly. Instead, you may need to set up a tunnel, using the settings presented in the config file.
The steps to apply WireGuard here are exactly the same as you would to set up any WireGuard tunnel. These config files are just valid WireGuard tunnel parameters, which will add it to the network. Below, we provide some generic instructions on how to do this, but again, searching for any instructions to set up WireGuard on your device will work. Just use the settings from the configuration file.
Install WireGuard
First, WireGuard must be installed on the target platform.
To install WireGuard, follow the official WireGuard installation link, and find instructions for your target device: https://www.wireguard.com/install
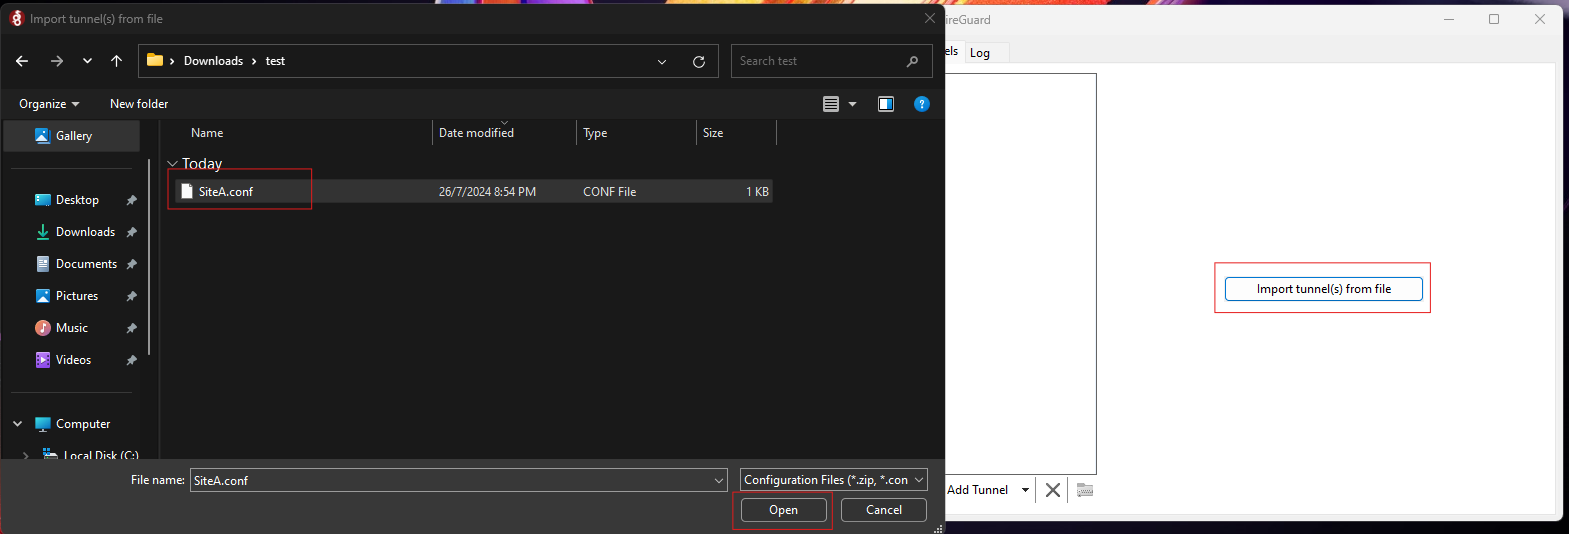
Apply Configuration via WireGuard GUI (Windows)
On Windows, you’ll get a GUI application to import WireGuard files.
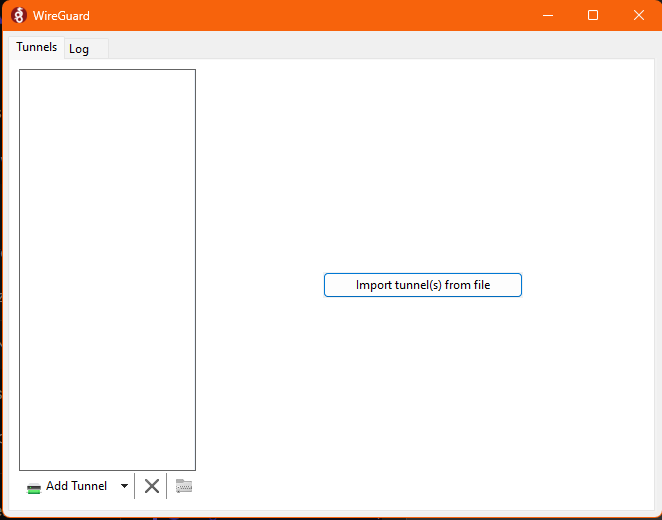
Click the Import Tunnels button, and select the config file (If you have not done so already the config file must be downloaded or transferred to the target device).
After importing the static client configuration file, click the Activate button to make the tunnel active.
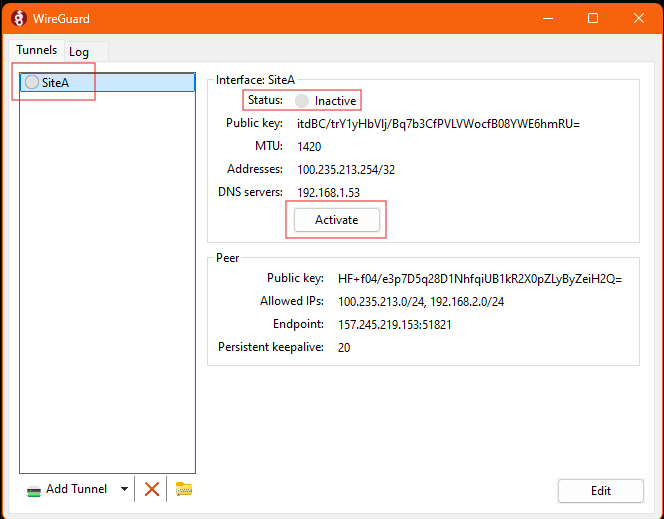
If successful, it will show an “Active” status alongside some additional information such as the connection handshake status and total data transfer amount, which can help verify the connection is working.
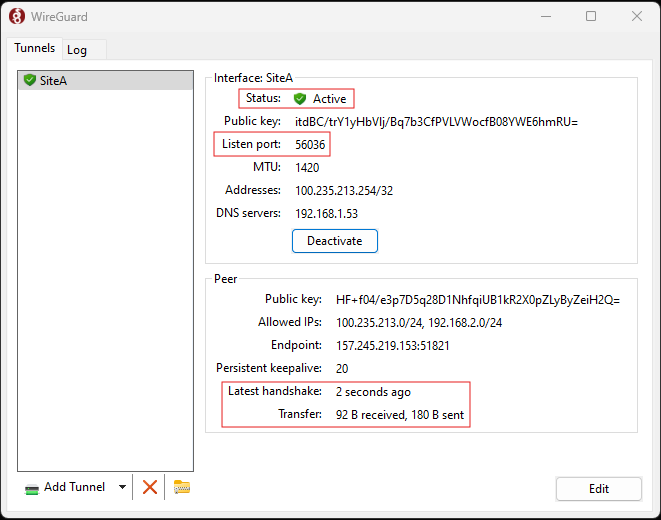
Now this static client can reach any other hosts in the network through the “Remote Access Gateway” host. So, basically it can reach and access network resources of the hosts which are available inside the netmaker network and reachable by the “Remote Access Gateway” host.
The windows terminal can be used to check all the WireGuard interfaces and tunnels and can also be used to configure custom interfaces. Open up Windows terminal app, then type wg and press enter to show all the WireGuard interfaces and peers configuration.
Apply Configuration via WG-Quick - Linux, MacOS, and Others
Wg-Guick is the easiest tool to get a tunnel active on Linux and Mac (as well as some other operating systems), and is included in the wireguard-tools package. To use a static file on Linux with wg-quick just:
-
Download, transfer, or copy/paste the config file to the device.
-
Run “wg-quick up ./path/to/config.conf” from the terminal
This will configure and bring up the WireGuard interface.
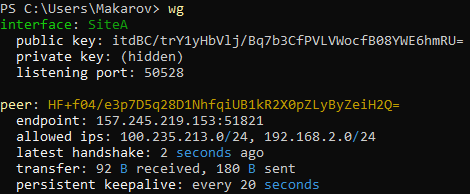
We can use “wg” command to verify the interface as shown below:
It will show the handshake and other statistics of the wireguard interface upon successful connection. Similarly we can use the command “wg-quick down ./wg.conf” to bring down and remove the WireGuard connection and interface.
Always On-VPN for Windows Devices
Using PowerShell, an always-on vpn tunnel can be created for user devices. Just open up the windows terminal and use the following command to activate an always-on vpn using the previously downloaded static client configuration file:
wireguard.exe /installtunnelservice "C:\Users\%USERNAME%\Downloads\test\SiteA.conf"
Now the static client will automatically connect to the remote access gateway even throughout machine reboots. The WireGuard for windows actually creates a system service for handling the tunnel, so once the adapter is configured it should survive reboots and automatically reconnect.
Next Steps
We did not mention configuring Routers in this section, which we will cover in the next section, where we will walk through setting up site-to-site connectivity using Netmaker. There are two primary approaches to this, using static config files, or using the netclient.