2. Add Non-User Devices
Adding Target Devices to act as Endpoints and to Forward Traffic for the Network
Overview
Non-User devices are the devices that act as endpoints and routing nodes of the network. They are either the machines you wish to reach, or machines through which you will route traffic. Typically these are servers and routers.
Non-User devices can be added to the network in two ways:
-
Using the Netclient
-
Using WireGuard config files
Adding Devices with the Netclient
The Netclient is supported on Linux, Docker, Windows, and MacOS. If a device runs one of these operating systems, it should be added using this approach.
Once a device is added to a network using the Netclient, it appears as a “Node.”
This is done in 3 steps:
-
Create an Enrollment Key
-
Install the Netclient
-
Join the network with an enrollment key
Create an Enrollment Key

Keys determine which network a netclient will be able to access when it joins the server. If you are using the default network, there will be a pre-defined key you can use to join the network. Otherwise, go to the Enrollment Keys menu item to create a new key.
Name: an identifier for the key
Type: Define the number of uses (or for how long) the key is valid, to limit access
Networks: The networks this key will grant access to
Relay: If your network has a relay defined, add machines to it automatically.
Helpful Hint: You can create an enrollment key without any network access. This will allow devices to enroll with your server, and an administrator can choose which networks they should have access to. This is helpful for use cases where you may want to allow unknown devices to register with your network, and allow an administrator to review before granting access to the VPN.
Add Devices
In the Nodes screen of your network, click “add a new node”. This will give you instructions for installing the netclient and joining the network with the enrollment key.
Select an Enrollment Key
You can select the key from the previous step, or create a new one in the menu.
Install Netclient
Choose the target platform, and follow the installation steps for the netclient.

Join Network
Once the netclient is installed locally, join the server using the enrollment key and provided command.

Helpful Hint: You can deploy multiple docker netclient containers on a single machine, but need to have distinct volume mounts and names. If you wish to do this, just increment the name and volume mounts like this:
sudo docker run -d --network host --privileged -e TOKEN=xxxx-v /etc/netclient:/etc/netclient-<x> --name netclient-<x> gravitl/netclient:v0.25.0
Adding Devices with WireGuard
For devices that do not support the Netclient, such as Routers and IoT devices, you can create WireGuard config files which can be run using any flavor of WireGuard on the device. This consists of four simple steps:
-
Add a new node

-
Choose the config files option, specify the node name, and select your gateway.

Even if your node is not configured as a remote access gateway in the gateway list, it will be automatically created during this process.
3. Select Config files filter and click on your WG config file to download the WG configuration you created for the target device.

4. Run the WireGuard configuration on the target device
Another option is to create the WG config client through the Gateways interface by following these steps:
-
Define a Gateway on your network
-
Generate a config file on the Gateway
-
Install WireGuard on the target device
-
Run the WireGuard configuration on the target device
Define a Gateway and Create a wg config file

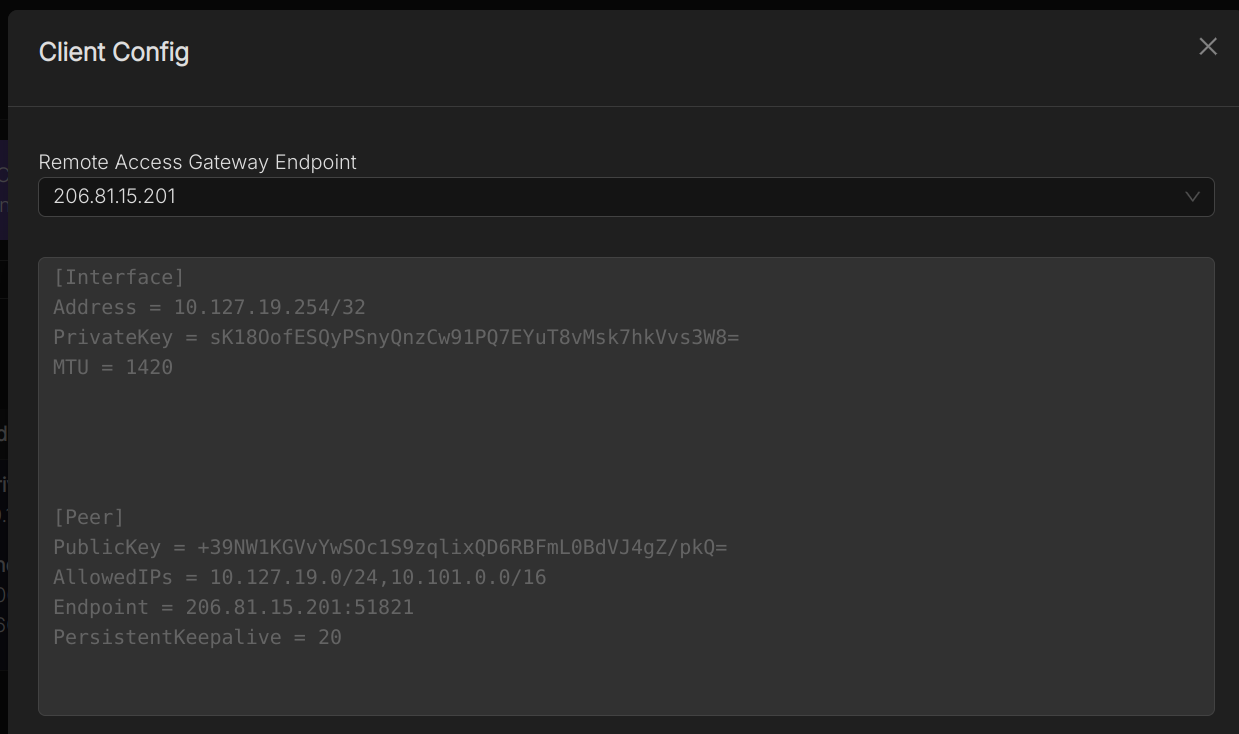
Generate WireGuard Config Files
Once you have a Gateway, you can generate config files on the gateway, which can be applied to any device. The gateway will forward traffic between the WireGuard client and the VPN network.
-
Click “Create Config”
-
Enter a Client ID to identify the device

Helpful Hint for Routers: Under Advanced Settings, there are is a field for Additional Addresses. If you are planning to put this config file on a device that acts as a router to a local network, specify the reachable local addresses here. For instance, a LAN with a subnet of 192.168.1.0/24. On the target device, you will need to add forwarding rules for the local network, but then, your VPN will be able to reach the local network via this config file.
After creating the file, you can view and download the file by clicking on it.
Install WireGuard on Target Devices
Follow the steps at https://www.wireguard.com/install/ to install WireGuard on the target device. For Routers, there is likely a WireGuard plugin that can be installed.
Run WireGuard Config File on Target Devices
Download the created config file to the target device and run it using WireGuard. Depending on the way WireGuard is installed, you may need to enter the fields manually. E.g. with router plugins, you will need to specify a new WireGuard interface, and enter the fields for the Address, the PrivateKey, and Peer manually.
After this is done, the device should have access to and from the VPN.
Next Steps
After all Non-User devices have been added to the network, you may want to define some additional routing into, out of, and between devices in the network, which we will do next (and before granting users access).